Freezer Meals 2.0

So far, I’ve tested two freezer recipes.The BBQ chicken recipe was very tasty, but strangely didn’t taste like BBQ to me- I’d still eat it again though. The second was a basic sloppy joe recipe, used to get rid of all the hamburger buns we had. We spiced it up by adding more spices and vegetables, but it was simple and good.

I wanted to share more info on the process and a few photos.

I split the process up into two days, because I didn’t have a whole afternoon to devote to it. In total,I did 3 hours on my own, and 3 hours with my husband. I accomplished way more with him; I think if I’d had his help the whole time, we would’ve been done in 4.5 hours instead of 6. I highly suggest team work for these meals! It’s much simpler to have one person chopping up vegetables and working with those ingredients, while the other person is actually assembling the recipes into bags. It goes by so much faster, and it’s nice to have the company.

We started by choosing the recipes we’d use. We chose a variety of recipes so we had an option for any situation- some that are longer cook times in the crock pot, shorter times, some that have to be thawed a day in advance, some that don’t, some that can be thrown in a frying pan, etc.

We had a big grocery store run.

At home, we started gathering all the ingredients we needed. We have a large kitchen, so we had a lot of room to just spread out.

We tackled the meals by meat– we made all the chicken ones first, then ground beef, then steak, then all else. We prioritized the amount of time needed as well; for example, we stuck the twice-baked potatoes in the oven first because they cook for so long, then moved on to making bean and cheese burritos.

We wrote the name of the meal and cooking instructions on the freezer bag first. We then would move on to making that meal and filling the bag. For several meals that sounded good, we went ahead and made 2 meals of that type. A lot of the recipes are designed anyway for families of four, but since there’s 2 of us, they were often doubled for us already.

We then prepped the food! My husband chopped vegetables and meat up, while I measured out spices, sauces etc. into the bags. Chopping takes a long time when there’s so much of it! Measuring was quick though. So I also prepped other food while he was chopping, like the twice baked potatoes, and other things that required no chopping while being baked etc.

After finishing bags, we made sure they were sealed tightly, and fit them all in our freezer (we’d cleaned out our freezer and made room before hand- important point!).

All that’s left, is to eat! In total, we made 20 meals, enough for 2 people each (so 40 meals in total). Some of those are burrito and chicken finger lunches, but the rest are dinners. The cooking wasn’t too bad, and we’ve enjoyed the convenience even over just 2 days, so we’ll definitely be doing it again. We’re thinking of blocking off 1 weekend a month to do it- get the shopping trip and cooking out of the way and be good for a month. We’re only using the meals on weeknights, so 20 meals lasts a whole month. Weeknights, we have classes and late nights at work. Weekends, we’re free to cook though.

Best of luck to those trying this endeavor! Let me know if you have any questions!

IMG_2550

Bean + cheese burritos were cheap and super fast to make 12 ofIMG_2551

Wrote the instructions on the bag.

IMG_2554

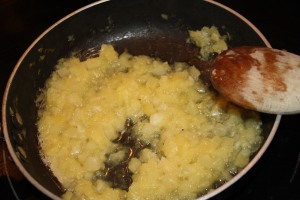
BBQ chicken for the crockpot

IMG_3246

We’re not the most organized freezer packers, but there they are! We actually reorganized after this, into neater stacks, but I forgot to take a picture of it.

Here’s a few more links to other recipes we used as well:

Peanut chicken- http://www.creativelydomestic.com/2012/01/spicy-peanut-chicken-freezer-meal.html

Honey sesame chicken- http://www.myrecipes.com/recipe/ugc/u-slow-cooker-honey-sesame-chicken-freezer/

Twice-baked potatoes- http://www.food.com/recipe/make-ahead-twice-baked-potatoes-57062

Chili- http://happymoneysaver.com/darn-good-chili-recipe/

Freezer Meals

We’re starting the year off with a goal to eat out less, and cook healthier. We both enjoy cooking, and try to cook at home as much as possible, but between work and night classes, it can be hard to cook dinner and prep lunches every day. I finally caved in, and started planning to make some freezer meals to start the new year and new semester off on the right foot! Equipped with a sharpie, freezer bags, and a huge cart of food, we set off on a journey to plan weeks of meals in advance. I’ll document the process in the next blog post, but wanted to share some of my favorite blogs and recipes on the topic so far:

Downloadable organized shopping list and recipes: http://therealisticorganizer.blogspot.com/2014/01/organized-slow-cooker-freezer-meals.html

Tips and recipes:

http://www.lifewith4boys.com/2013/09/28-meals-in-3-hours-freezer-to-crockpot.html

Simple recipes:

http://www.sixsistersstuff.com/2013/08/50-easy-freezer-meals.html

Wedding Favors

IMG_0346

We used paper bags to decorate for our wedding favors. I used the peacock feather stamp I already owned, found a “Thank you” stamp on E-bay, and used the letter stamps from an alphabet set I bought from Michael’s to stamp “T & T” on the bags. We hole punched the tops, and tied with ribbons. Inside, we placed sealed bags of coffee beans in some bags, and tea in others. They were quick to put together, and didn’t have any favors left over!

Centerpieces

IMG_0166

I purchased the vases and stones from Dollar Tree, peacock feathers from E-bay, and ribbon and floating candles from Michael’s. I used hot glue to attach the peacock feather and ribbon. The centerpieces were quick and turned out pretty! They were set on the tables with purple tea lights, also from Michael’s, and the table numbers, as pictured above.

IMG_2552

Anniversary Scavenger Hunt

For our first wedding anniversary, I planned a scavenger hunt for my husband. I hid clues around our apartment, and our cars, and he had to solve the clue to move on to the next thing. Clues lead to gifts, and to things to do- we went to brunch at a peacock-themed restaurant (influenced by our peacock-themed wedding!), made cotton candy martinis (his favorite drink we tried at a restaurant in St. Petersburg for Valentine’s Day), had homemade cheesecake (his favorite dessert) and more. It was a fun day.

IMG_2678

I was inspired by this scavenger hunt: http://www.staceywestbrook.com/a-valentineanniversary-scavenger-hunt/

IMG_2676

Cotton candy martini recipe: http://hubpages.com/hub/The-Best-Cotton-Candy-Martini-Recipe

IMG_2705

Cheesecake recipe: http://www.kraftrecipes.com/recipes/philadelphia-classic-cheesecake-52544.aspx

I made the cake topper myself, by finding a plain banner and typing the words over it, printing it, cutting it out, and taping it to skewers. I was inspired by this cake topper:

Cheesecake recipe:

Colombian Hotdogs

In the last few years, I’ve gained a deep love for Colombian Hotdogs. The more toppings, the better! At first, I was hesitant to just pile them on, but once I enjoyed a quail egg on my perro, there was no going back my friends.

After trying so many hotdog shops, I finally decided to try my hand at them at home. I found this site-

http://www.sundaebrunch.com/2013/07/colombian-style-hot-dogs-aka-perros.html

And I went to work!

IMG_2405

I whipped up a pineapple sauce first.

IMG_2406

Then I mixed up the pink sauce.

IMG_2408

I bought quality products, including all-beef hot dogs, the fluffy potato buns, and a bag of the fried shoestring potatoes (I prefer this over crushed potato chips which is also a good option). I also  ketchup and added a thin slice of ham, and melted mozzarella cheese under the potatoes!

Garlic sauce, cilantro sauce, bacon, quail egg, and much more can be added as toppings. Have fun!

Holiday Cookies

IMG_2404       IMG_2409

I wanted to make two batches of cookies- some chocolate cookies for me and the chocolate-lovers in my life, and something for my husband and the other not-chocolate-lovers. I stumbled upon this site, which had two recipes usually substantially the same ingredients and process, one for chocolate and one for sugar cookies– perfect!

http://sallysbakingaddiction.com/2013/12/03/candy-cane-kiss-cookies/

I skipped the sprinkles, because of a shared dislike of them, and decided to make things colorful by food dyeing some of the cookies red and green.

IMG_2401

I also tried to spiral a few (as seen here- http://www.justataste.com/2013/10/pink-pinwheel-sugar-cookies-recipe/ ). However, spiraling cookies isn’t something you just do willy-nilly it turns out. They turned out okay, but clearly needed to actually be more carefully spiraled to turn out as pretty as they looked online.

IMG_2403          10407493_871958785958_2894898355399050948_n

I followed the sugar and chocolate recipe carefully, only leaving out the sprinkles and adding some food coloring for some sugar cookies. I alternated the cookies, leaving some plain, and added the peppermint kisses to half of them.

The chocolate cookies are almost brownie-like; very moist, and super chocolatey, sweet goodness. They were good with the peppermint as well.

The sugar cookies are pretty typical sugar cookie flavor, but moist and delicious. The peppermint kiss added a unique twist to a typical sugar cookie.

Overall, I recommend both recipes, and it worked out well to make both. You can whip up the chocolate first, and let it sit in the fridge while you make the sugar cookies. I was able to get them both done pretty quickly that way. I got bags from Michael’s, to bag them and decorate with ribbons etc. to give them to friends for Christmas!

DIY Toss Bouquet

IMG_0112 IMG_0070

I used some of the handmade fabric flowers (see previous post on them!) to create our toss bouquet. To create the bouquet:

  1. Gather your fabric flowers. I used my previously made one, and bought a few from Michael’s.
  2. Hotglue wires to the back of each of the flowers- ensure the wire is long enough to create the length of handle you want.
  3. Wrap fabric tape around the wires, securely.
  4. Wrap a thick ribbon around the wires, and secure with dots of glue. I tied another ribbon in a bow at the top, and used a dot of glue to add a peacock feather.
  5. You’re done! In total, mine had 13 flowers in it and took about an hour to make (not including the time to handmade the flowers).